Thursday 23 October 2014

Mixed Media Style :D

I started with green and orange acrylic paint and 2 sizes of punchanella, and I dotted this around randomly on a white piece of card, I then let this dry. I then coloured the background using distress stains (aged mahogany, pine needles, rusty hinge, walnut stain and vintage photo) and when this was applied and had dried, the acrylic had acted as a resist. I then added some stamping in walnut stain with some texture stamps, but it was a bit too prominent, so i added some more water and it blended out a bit. I then stamped the main image onto the dry background in stazon and onto a spare piece of card which i also coloured with distress stains, I then cut this out and layered it on top. I added the dymo sentiment and a black line around the perimeter of the background piece, but it seemed too flat hence all the white signo uni ball detail :D I also made this card in duplicate, as i knew i was going to give this one away straight away and i wanted one on my shelf as inspiration :D


Tuesday 21 October 2014

Hexagon Card :D

The background was made using a damask stencil (love this stencil!!) and a new technique i hadn't tried before. I used the mini distress ink pads, mustard seed, peacock feathers and picked raspberry, and i inked up the mask, you then lightly mist over the surface with water and then you flip over the mask and use it as a stamp, and this was the second generation version :) The bird is another one of the Dina Wakley set (i think this ones my favorite)... I'm not really sure about the buttons and ribbon at the top, but it looked to empty without it...

Saturday 18 October 2014

Two Kites :D

A simple card, with an inked cloudy background, some rolling hills out of a couple of patterned papers and a piece I had inked... and then 2 kites made from scraps. I used bakers twine for the strings and added the little double triangle things as 'bows'. And then to finish it all off I added some running stitch doodles and some swirly doodles (similar to the bakers twine string swirls) as a border :D

Thursday 16 October 2014

Roald Dahl :D

I used a Roald Dahl decoupage pack and one of the postcard packs to make this card. It was for the competition Docrafts were running on their facebook page :D And to my complete surprise I just saw that I was one of the runner ups :D https://www.docrafts.com/Features/roald-dahl-crafting-competition-winners/100. I started with an 8x8 card blank, but wanted to do something different, so I did a fold back panel and then used the scalloped wave die from the nautical build a scene dies, I'd been meaning to use this as a scallop for ages :) I then decorated the base of the card with the papers from the pack, and some of the packaging too (the colourful spots) I love that design so much! I then made up some of the decoupage, but wanted it to hang over the fold back, so I mounted it on one of the postcards and added a few extra elements from the two pages of decoupage in that set :) I made up the little book, and decorated the front cover with a layer of decoupage and a couple of other elements... and I even added a little bakers twine bookmark in the middle... I loved the finished result so much that my initial idea of sticking it to the front went out the window... and I added an extra strip of golden ticket paper to act as a place to hold the book to the card, but so that it was still removable :D I added a few buttons, some red and white bakers twine, some of the spinners from the pack, some pompom trim I had and some red spotty patterned craft tape :D


Wednesday 15 October 2014

Staple Butterflies :D

Again the same process, however I used Aged Mahogany, Fired Brick, Rusty Hinge and Vintage Photo distress stains... I did a couple of versions in this colour way as well as a couple in the greeney colour way....

Monday 13 October 2014

Staple Butterlies :D

This card is a different colour way to the previous one I posted, I've also done an orangey version which I'll upload next :) For this version the process is the same as the greeney version, except I used Dusty Concord, Pine Needles and Vintage Photo distress stains... as well as metallic silver Artiste acrylic paint.


Saturday 11 October 2014

Staple Butterflies :D

I was inspired for this card from a youtube video I saw by Shari Caroll (https://www.youtube.com/watch?v=-jQeUiuVa2o&list=UUirlgMtCw6OSlWcW3H1ZSDA) I thought I'd add the link in case you're interested :D I had a few products which she had used, but I put my own spin on it.... and I now have my new favorite thing, stapling butterfly's onto a card :D I used Chipped Sapphire, Pine Needles, Peeled Paint and Weathered Wood distress stains for the background... Pine Needles and Vintage Photo distress stains for the butterfly's.... I used watercolour card, whereas I usually work on smooth white card, but I really like watercolour card now lol :) for the damask stamping I used the Tim Holtz distressed damask stamps and the Metallic Silver Artiste Acrylic paint to stamp with, it works brilliantly.... I then used my dymo labeller for the sentiment, a piece of Madame Payraud patterned craft tape, a piece of brown spotty ribbon, and an arrow paperclip, which I actually got in IKEA :D I've done a few more colour ways of this too as I liked it so much and I might post them at some point too :D


Wednesday 8 October 2014

Toadstool Pin-Cushions :D

I had the idea for this back in June when I had just finished my exams, and I've just gotten round to making it... I was going to make everything from scratch, however the other day in my local garden center, they had reduced a pack of those Wendy Vecchi art parts, and so I got the one for a cupcake stand for £1... and so that's what made me finally make it... the 2 paper board circles I used for the bottoms of the toadstool tops should have been the bottom of the cupcake stand, and the square with the 4 separate scalloped edges should have been the top part for the cupcake to stand on... I was quite pleased that the pack happened to have the perfect pieces in it :D Then for the 'stalks' I used a few of my mums old wooden cotton reels and I had a pack of smaller ones which I used too :D For the tops (the pin-cushion part) I cut a polystyrene ball in half (and by luck the diameter of the paperboard circle was the same as a polystyrene ball I had brought to make a bauble from) I then used super strong tape around the perimeter of the bottom edge and stretched over a piece of red and white spotty fabric :D To neaten up the edges I then used super strong tape again to stick a length of ribbon around the seam and finished the join with a bow (the stripy red and spotty green ribbon was from a spots and stripes ribbon pack, the red bow was from the portobello road range, and the green bow was from the winter me to you bow pack :D Then I just added some pearl headed pins and a little bit of red and white stripy bakers twine :D

Monday 6 October 2014

Zentangle Holly :D

I'm not that great at Zentangle, I think I'm a bit too impatient, however I saw Mel on Create and Craft show this Holly Zentangle using a grid, so I thought I'd give it a try and use it as a background... I changed it slightly by drawing the grid in pencil so I could rub it out later, however I'm not sure it was the right choice as when I showed it to a friend all she could see was circles in the background and not the 
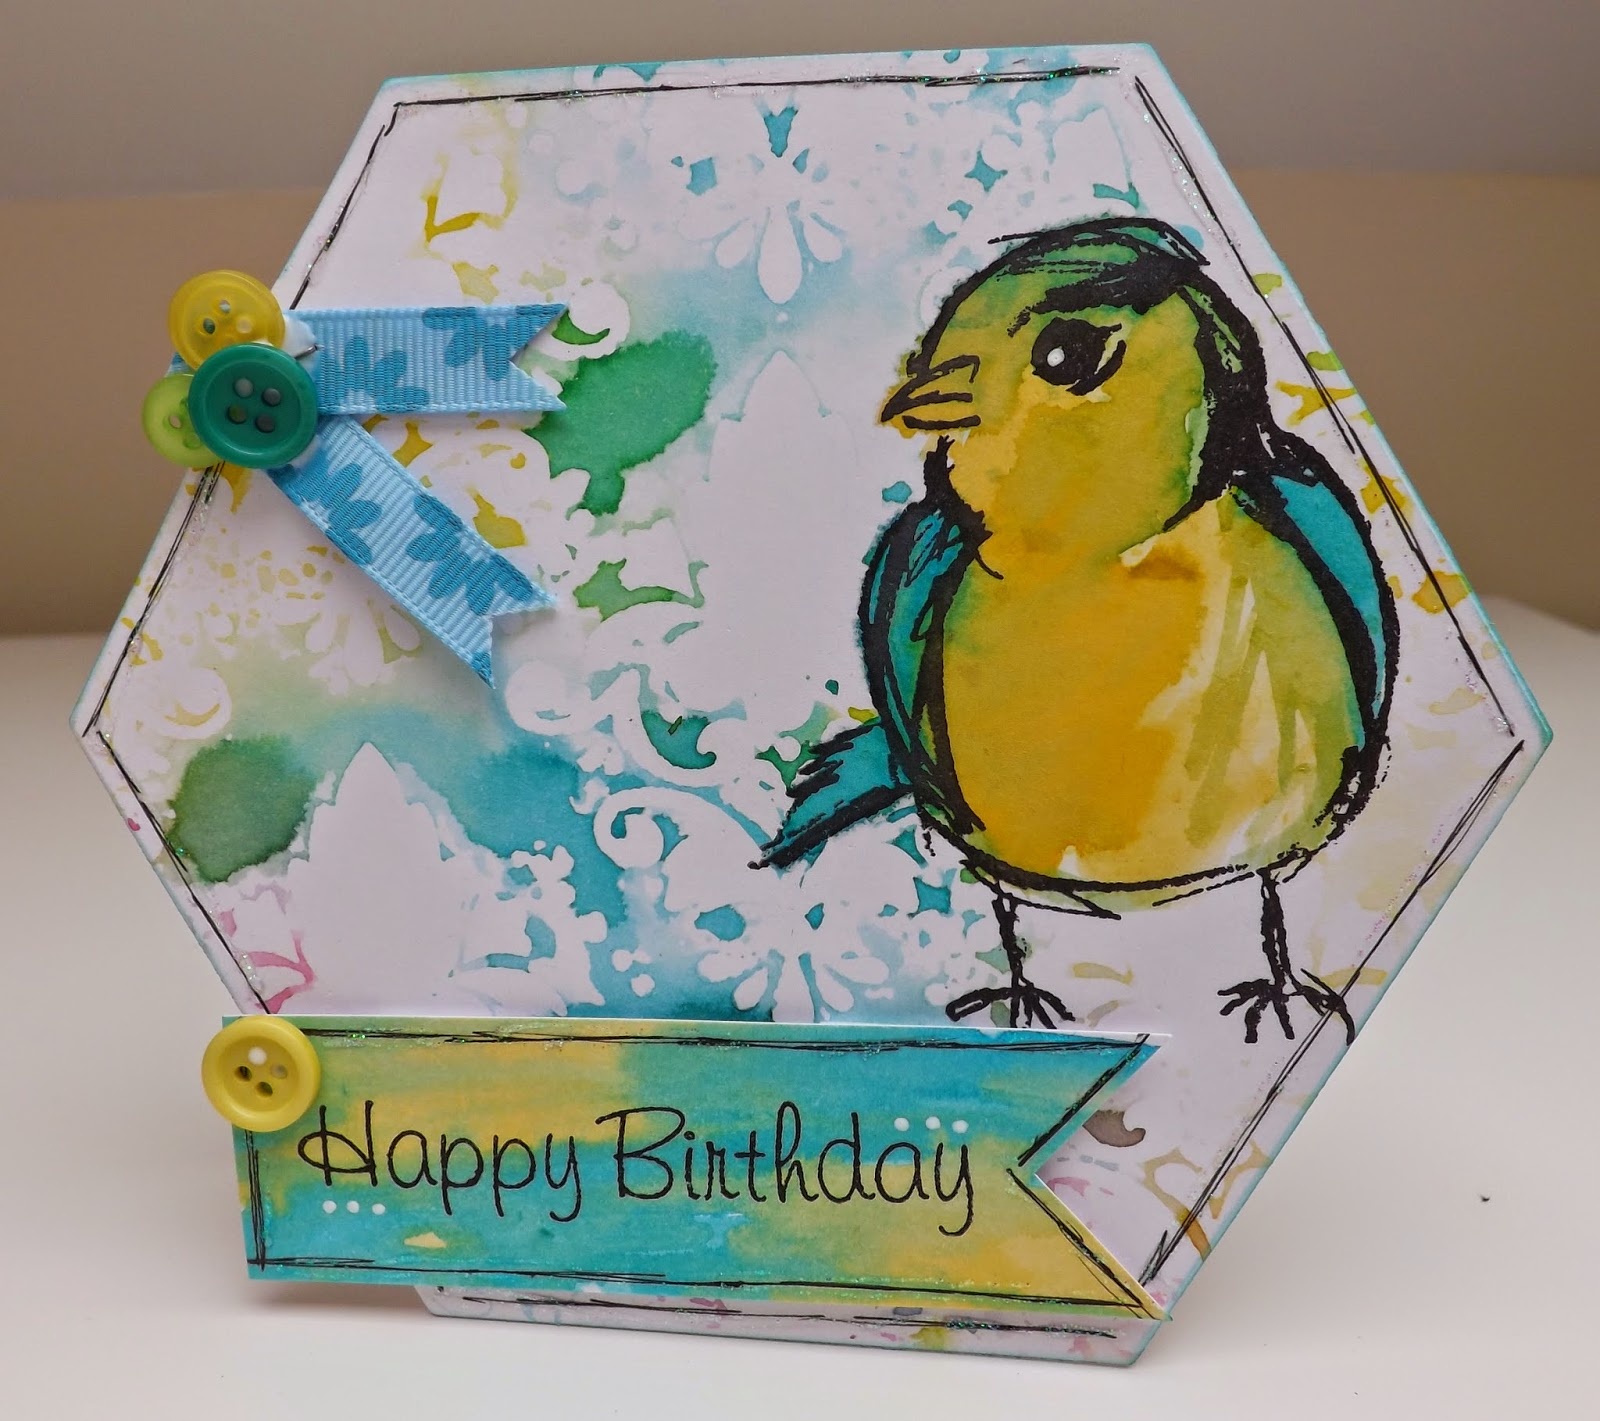
holly lol, but anyway it was worth a try... I love this scribbly bird by Dina Wakely, and when I saw this pose, I knew it had to be a robin, so I water coloured it using Walnut Stain, Vintage Photo, Wild Honey, Rusty Hinge, Fired Brick and Aged Mahogany distress stains. Once I'd assembled the card, I thought it looked a bit empty, hence the black splashes in the background :) and then to finish it off I just added a bit of red glitter glue to the holly berries and a Happy Christmas sentiment :D

Sunday 5 October 2014

Simple Snowflake :D

I made this card as a thank you to one of my mums friends who gave me this snowflake die that she'd gotten free on a magazine... however after I'd made it I thought that I could do a similar version with the free x-cut die that was on an issue of creativity recently :) I really love the way this turned out... I started with a piece of white card which I covered with Waterfall green and Galactic blue Daley Rowney Pearlescent inks (I don't think the shimmer comes across in the photos...) and then I wasn't sure what to do to begin with so I just cut a few snowflakes out and arranged them on a square card blank... I'm not very good at leaving a card simple, and thought it looked a little plain with just the snowflakes so I decided to use an embossing folder, and this lead to the shorter front than the back, because the folder was 5x7 and so didn't completely cover the front and I didn't want a join, but I actually think that this makes the card better and so I'll probably do this again in the future :D I then just added the sentiment which is from a stamp set that was free on Creativity ages ago and I used a small labels 20 Spellbinders die and then just added some white faux stitching :D :D


Saturday 4 October 2014

Butterfly Trio :D

This is very similar to the previous card, but I tried a different colour way.... It'll probably be a Birthday card for my sister whose favorite colours are blue and grey :) I used Calypso Teal, Slate Grey and little After Midnight dylusions ink sprays for the background, and this time I used Faded Jeans and Weathered Wood distress ink for the stamping :) Again I stamped the butterflies onto the background and onto a spare piece of background so that they're 3D on the card, also stapling them on, makes the card fold a lot flatter when in the envelope :D

Friday 3 October 2014

Floral Congratulations :D

I used a selection of Happy Days papers, Me to you Spring time papers and some pre-made PM flowers. I also used the xcut petal posy dies and the daisy palm punches in 2 different sizes. I love this effect of a mis-match of flowers, I did it on an up-cycled photo frame for another friends 21st, but I'm not sure where the photos are... The little scrunched flower toward the middle at the bottom is made from 5 punched circles scrunched up, its the palm punch that fits around the bigger typewriter key letter stamps :D The congratulations is one of my favorites from a free stamps set from a creativity mag the one with the globey thing on. and the pink behind the sentiment is a piece of bias binding that i had pre-dyed for another card ages ago...


Butterfly Trio :D

This is a variation on the big butterfly Happy Birthday card that I've made before.... I started off making an inky background using tangerine dream and funky fushia dylusions ink sprays. I then used mustard seed, spiced marmalade and picked raspberry distress inks to add some stamped detail to the background. I stamped the same butterfly 3 times onto the background first and then onto a spare piece of the background... I cut them out, inked the edges and then stapled them directly over the top of the stamped image... I added a doodle line border and then raised the panel with 3D foam tape, and stuck this to a 5x7 card blank... on another spare piece of background I then stamped the sentiment and cut this into a banner shape, and also added this with 3D foam :D To finish it off I then added butterfly trails and a few dots in a white gel pen :D