Monday, 22 May 2017

Spellbinders Seahorse Thanks :D


A sea themed card using lots of gorgeous Spellbinders dies :D I had the idea for the background of this card while on a car ferry, I was looking out of the window down and the sea and was inspired by the gorgeous colour of the sea with that white spray (created with the white acrylic and natural sponge) then I finished the card off with a cluster of gorgeous Spellbinders dies :D Links to where you can buy them below :D This was actually a thank you card to one of my new crafty friends, Christina, shes been sooo generous and lovely, that I just had to send her another thank you card to show how much I appreciate everything :D

I used the cool brayer attachment for the Tool N One to create my background :D I've only just gotten this, and it's a fab nifty little brayer, I can't wait to try it out on my Gelli plate too :D I think it'll be great for creating some cool ombre backgrounds :D The background was probably the most complicated part of this card (see video below for full process) :D After it was all dry, all I did was die-cut lots of elements from white card, then I used lots of colours of Embellishment Mousse (listed below) along with my finger to colour in the die-cuts :D Hope you enjoyed today's video :D

Main Spellbinders products used in this video :D
Spellbinders Platinum 6 Die-Cutting Machine
Standard Platinum Plates
Fabulous Fretwork Die
Victorian Letters Die Set
Seth Apter Drip Drop Die
Art Nouveau Sea Life Die Set
Tool N One
Brayer Tip Add-on

Other products :D
Tonic Studios Nuvo Embellishment Mousse - Pacific Teal, Aquamarine, Citrus Green and Orange Blush
Nuvo Creative Pens - Metallic Gold
Tonic Studios Nuvo Crystal Drops - Morning Dew :D
White Acrylic Paint
Natural Sponge

To see the process behind this Spellbinders filled card, please watch my YouTube video below, or over on my channel CRaFTi PoTeNTiAl :D


Lots more photos below :D


Sunday, 21 May 2017

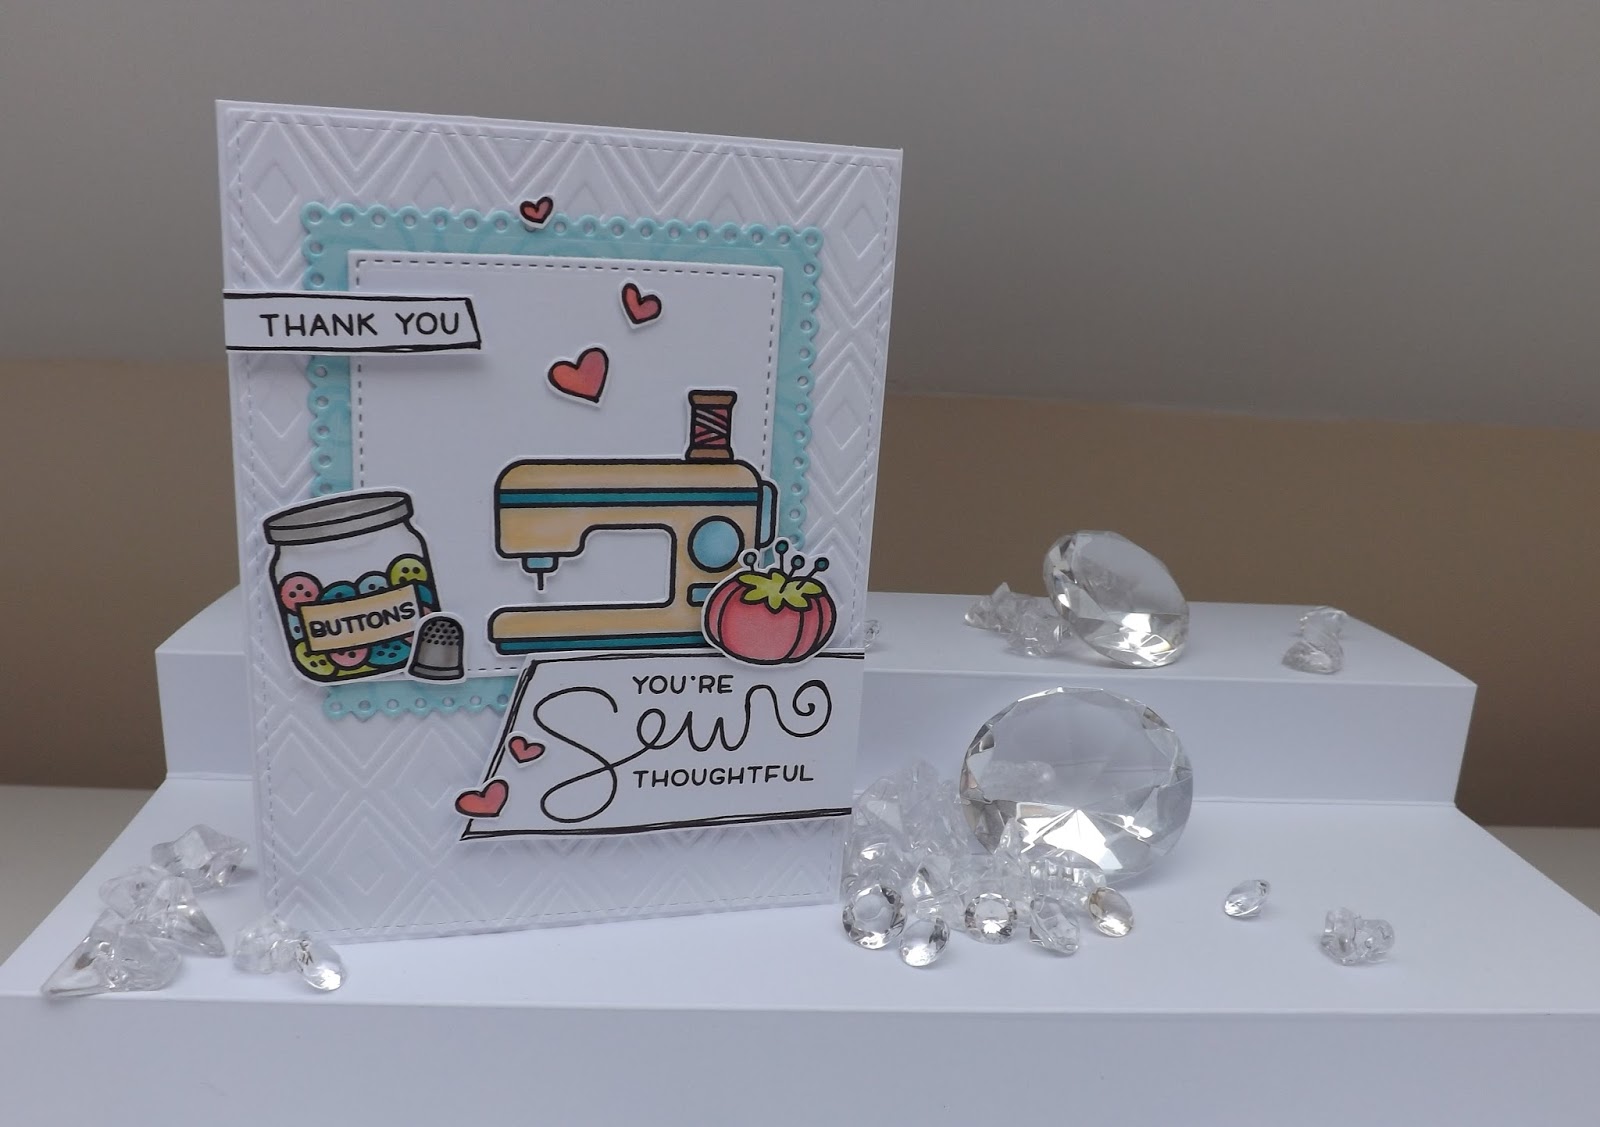
Mix and Matt You're Sew Thoughtful :D


A fun sewing themed card combining the versatile Mix and Matt freebie from issue 24 of Die-Cutting Essentials with the Sewn With Love Lawn Fawn stamp set :D :D :D I had two features in this month's issue of Die-Cutting Essentials, one combining this freebie with Lawn Fawn stamp sets (hence the Lawn Fawn here lol, LOVE Lawn Fawn :D) and the other using some buildable Nellie Snellen dies :D So don't forget to grab your copy, there's tonnes more of fab articles inside, and I think there is a total of three features using the Freebie this month too :D Hope you enjoyed today's video :D :D :D

Don't forget to like my Facebook page if you want sneak peeks of upcoming videos, and also any great offers on crafting supplies too :D 

Main products used in this video :D
Die-Cutting Essentials Issue 24 - Mix and Matt
Spellbinders Platinum 6
Spellbinders Wonky Diamond Embossing Folder
Lawn Fawn Sewn With Love Stamp set
ProMarkers
Tonic Nuvo Aqua Shimmer Pens
Anita's 3D gloss 

To see the process behind this card, please watch my YouTube video below, or over on my channel CRaFTi PoTeNTiAl :D


Lots more photos below :D


Saturday, 20 May 2017

Life is Sweet Distress Marker Watercolour :D


A trio of cards made with the Simply Cards and Papercraft Life is Sweet freebie from issue 163, I decided to do a loose watercolour effect using the Tonic Studios Tim Holtz Stamping Platform along with Ranger Distress Markers :D This was a technique I saw in one of Tim's demonstrations when the Stamping Platform was launched, and I just had to give it a try now I have my own platform :D Thanks so much to Tonic Studios for sending me one of their Platforms for me to use in my videos!! I have to say the quality is phenomenal and it feels like such a sturdy tool, it's definitely gunna last a lifetime, I love the fact that the lid flips over, and that every part of it is wipe clean, it works perfectly with this technique!! I wouldn't want to do this with my MISTI as the foam insert would get wet, but because the Tonic Stamp Platform has a lid that can flip over, there's no need for the foam mat :D :D I also LOVE that when the Platform is open, it lays flat! You might have noticed in my videos that when I use my MISTI I support the lid with my hand when inking up my stamp, but this is lovely and sturdy when open so you can ink your stamp while it's resting on your surface :D :D Hope you enjoyed today's really simple video :D

The majority of the products used in this video are available to purchase from CraftStash :D

To see the process behind this trio of stamped watercolour cards, please watch my YouTube video below, or over on my channel CRaFTi PoTeNTiAl :D


Lots more photos below :D


Friday, 19 May 2017

Starfish Partial Distress Oxidation :D


A funky starfish themed card using The Sea View Collection stamp set free with issue 43 of Creative Stamping :D This was a new technique I discovered when making my last Art Journal layout :D It seemed to be more effective using the purple Aquaflow over the top, but you can still see the partial oxidation in real life, it just doesn't come across that well on camera :D This was such a simple card, I literally just stamped the starfish all over the background in the two different colours of oxides, then I used a die-cut circle as a template to create my circle of 'partial oxidation' and to do that, all I did was colour a circle with the orange Aquaflow pen :D simple :D Then I finished the card with my heat embossed sentiment, a nest of gold metallic thread, and a scattering of gold sequins and Mustard Yellow Nuvo Crystal Drops :D Hope you liked today's video :D

Main products used :D
Creative Stamping Issue 43 - The Sea View Collection
Distress Oxide - Spiced Marmalade and Fossilized Amber
Tonic Studios Nuvo Aquaflow - Orange
Tonic Studios Nuvo Crystal Drops - Mustard
Cosmic shimmer detail Gold Embossing Powder
Papermaina Pink Heat Tool
Heat It Ranger Craft Tool
Tonic Studios Aqua Shimmer Pen
Spellbinders Platinum Die-Cutting Machine
Spellbinders Platinum 6 Machine 

To see the process behind this card, please watch my YouTube video below, or over on my channel CRaFTi PoTeNTiAl :D


Lots more photos below :D


Thursday, 18 May 2017

Distress Oxide, Chevrons and Cacti :D


A punny pair of cacti themed cards using another one of the NEW Creative Stencils from Craft Stash, the Chevron stencil :D I also used the wonderful cacti stamps from the Woodware Succulent stamp set, and to give them some character, I added on some glasses and a mustache from the Pretty Quick Silhouette Collection Male Sentiments stamp set (also available from CraftStash :D) Then I added the sentiments from the Woodware set into some Speech bubbles from the Lawn Fawn A Birdie Told Me stamp set :D :D :D

To create the background, I was literally just having fun experimenting with my Distress Oxides :D I think this was only the 2nd or 3rd time I'd used them, so I was experimenting, using the ghosting technique, and then using the stencil as a stamp, and ink blending through the stencil too :D Stencils are sooo versatile and this new range from CraftStash has some truly fabulous designs in it :D Hope you liked the video :D

Main products used:
Creative Stencils Chevron Stencil
Distress Oxide Inks - Cracked Pistachio and Broken China
Woodware Succulents Stamp Set
Pretty Quick Silhouette Collection Male Sentiments Stamp Set
Anita's 3D Gloss
Crafter's Companion Tape Pen
Coconut White Foundations Card
C6 White Card Blanks
Paper Trimmer
Black Ink Pad
ProMarkers
Cosmic Shimmer PVA Glue
Crafter's Companion Clear Overlay Sparkle Pen
Lawn Fawn Inks - Lobster and Carrot
Lawn Fawn - A Birdie Told Me Stamp Set

To see the process behind this cute pair of cacti themed cards, please watch my YouTube video below, or over on my channel CRaFTi PoTeNTiAl :D


Lots more photos below :D


Wednesday, 17 May 2017

Distress Crayons Gesso Resist :D


A fun duo of cards I made for CraftStash using their amazing NEW Creative Stencils range!! I used the Flourish Stencil in this video, and I teamed them up with the Gesso and Distress Crayon technique!! :D You simply scrape some Gesso over your piece of card, then let it dry :D Then simply scribble different colours of Distress Crayon onto the surface, and blend out with your fingers (if they need a bit of extra help in moving, just dampen your finger on a baby wipe, then try again :D) Once you've covered your background in colour, place your stencil over the top, then take a clean baby wipe and wring out some of the moisture (you only need it to be damp for this technique) then wipe through the openings of the stencils to remove the Distress Crayon (this is the resist part of the technique, as if you hadn't added the Gesso, the crayon wouldn't lift up with moisture :D) Simply Finish your card with a few die-cuts and a sentiment :D Oh also, I love the way this technique looks a bit like the shaving foam technique, but without the mess lol :D

Main products used:
Creative Stencils - Flourish
Creative Stamps - Bold Sentiments
Distress Crayons - Dried Marigold, Abandoned Coral, Spiced Marmalade, Cracked Pistachio, Twisted Citron, Tumbled Glass and Picket Fence
Gesso and palette knife
Baby Wipe (for removing the crayon through the stencil openings)
Sue Wilson Hibiscus Flowers Dies
Spellbinders Cascading Stars Die
Spellbinders Cascading Circles Die
Distress Ink - Dried Marigold, Spiced Marmalade, Shabby Shutters, Cracked Pistachio and Peacock Feathers
Perfect Medium Ink Pad
Cosmic Shimmer Detail White Embossing Powder
Papermania Pink Heat Tool
White Card

To see the process behind this pair of cards, please watch my YouTube video below, or over on my channel CRaFTi PoTeNTiAl :D


Lots more photos below :D