Thursday, 20 April 2017

Heartfelt Thanks Build a Bouquet :D


A duo of cards using the same design for two occasions, I have used the gorgeous Build a Bouquet Stamp and Die set which comes free with issue 162 of Simply Cards and Papercraft :D I've got so many ideas for this set, so I expect you'll be seeing quite a few video with it :D

I love the bright and cheerful spring colours I've used on this card, in fact, just add purple and you've got my five favourite colours :D For the background I did a washy watercolour using my Gansai Tambi's and once it was dry I added on some over stamping using Lawn Fawn Merman ink :D I used the same sentiment that I knew I would be stamping in black as the focal sentiment, and I used a ink splatter stamp from the Creative Expressions Butterfly Splash Stamp set by Lisa Horton :D For my die-cut frame, I used the Darling Doilies Die from a past issue of Die-Cutting Essentials Magazine and I used a Tonic circle layering die to cut out the centre :D To create a nice full cluster of flowers, I used the cluster stamp from the set, and also three individual flowers which I die cut with the coordinating dies, and I used some of the individual leaves too :D For the finishing touches to the flowers and the background, I added in some pre-made Nuvo Crystal drops (colours in list below) I love the way they just finish off the centre of flowers, and how they just add that final finishing element to a background, these are definitely one of my favourite Tonic products (along with the glass cutting mat and the Nuvo Mousse of course :D) Hope you liked today's video :D

Main products used in this video:
Simply Cards and Papercraft Issue 162 - Build a Bouquet Freebie
Die-Cutting Essentials Issue 21 - Darling Doilies
Gansai Tambi Watercolours
Crafters Companion Clear Sparkle Pen
Tonic Studios Layering Circle Dies
Tonic Studios Nuvo Crystal Drops - Sugared Almond, Bubblegum Pink and Caribbean Ocean
Lawn Fawn Merman Ink Pad
Ranger Jet Black Archival Ink Pad
Cosmic Shimmer Glue
White Card
VersaFine Onyx Black Ink Pad
Spellbinders Platinum Die-Cutting Machine

Also, just a heads up, Crafter's Companion are having a fab Spring Sale (affiliate link) with loads of products starting from only £1! :D And the sale is on until the 23rd April :D There's even lots of Leonie's products reduced too :D

To see the process behind this pair of build a bouquet cards, please watch my YouTube video below, or over on my channel CRaFTi PoTeNTiAl :D


Lots more photos below :D


Saturday, 15 April 2017

Lunar Animals Happy Easter :D


HAPPY EASTER!!! :D A fun Easter card combining some supplies I've had for a while, I got these papers reduced at Hobbycraft and I've been dying to use them on an Easter card :D A really simple card using a combination of dies, stamps and fussy cutting images from patterned paper, I don't think the process really needs much explanation, so enjoy watching how I made the card in the video below :D Hope you have a lovely Easter!! :D

Main products used in the video (affiliate links used where I can) :D
Mama Elephant Lunar Animals Stamp Set
Lawn Fawn Jet Black Alcohol Marker Friendly Ink
Creative Dies Ornate Frames Die Set
Easter Patterned Papers from Hobbycraft :D
ProMarkers
Lawn Fawn Plan on it Holidays Stamp Set
Avery Elle Dotted Large Rectangle
Cosmic Shimmer Glue
Cuttlebug Die-Cutting Machine
Crafters Companion Tape Pen
A6 White Card Blanks
Tonic Scissors

To see the process behind this card, please watch my YouTube video below, or over on my channel CRaFTi PoTeNTiAl :D


Loads more photos below :D


Friday, 14 April 2017

Masculine Butterfly Thank You Trio :D


A trio of identical grungy thank you cards in three different colours :D I think this style of a splashed distressed background really lends itself well to masculine cards, and the Creative Expressions stamps I've used are just perfect for this!! :D I used my MISTI to make these cards, as I thought when it's such a simple design I might as well make three in different colours :D Firstly I built up the background using a mixture of different creative expressions stamps, using three tones of a colour family to stamp them (I should however have cleaned the black archival ink off of the border stamp as it made a bit of a muddy colour, but hey, they look alright :D) After creating the background, I used an anti-static tool, then stamped my focal elements using black pigment ink, I sprinkled on my clear embossing powder and heat set, then for the final touch, I watered down some Pixie Powders in coordinating colours and splashed them over each card using a small round paint brush :D Hope you liked today's trio of cards :D My videos may become more sparse over the next couple of weeks, as I've got lots of Magazine Commissions to be getting on with, and they're what pay the bills lol, but I have the next three Mag Freebie videos planned, and I'll hopefully be back to my almost daily upload routine by the beginning of May :D

Main products used in this video (affiliate links used where possible) :D
Creative Expressions Lisa Horton Stamps - Stylish Script
Creative Expressions Lisa Horton Stamps -Butterfly Splash
Creative Expressions Lisa Horton Stamps - Arty Background
Creative Expressions Lisa Horton Stamps - Doodled Borders
Spellbinders Platinum Die-Cutting Machine 
The MISTI 
Versafine Onyx Black Ink
Cosmic Shimmer Detail Clear Embossing Powder
Hero Arts Ink Cubes - Lemon Yellow, Orange Soda, Pale Tomato, Soft Pool, Pool and Cornflower, Lime Green, Field Greens and Green Hills
Cosmic Shimmer Pixie Powders - Sun Yellow, Teal Wash, Midnight Blue and Golden Mint 
White Card
Crafters Companion Tape Pen
Cosmic Shimmer Dries Clear Glue

I think that's everything that I used :D

To see the process behind this trio of cards, please watch my YouTube video below, or over on my channel CRaFTi PoTeNTiAl :D


Tonnes more photos below :D


Thursday, 13 April 2017

Bright Cascading Butterflies :D


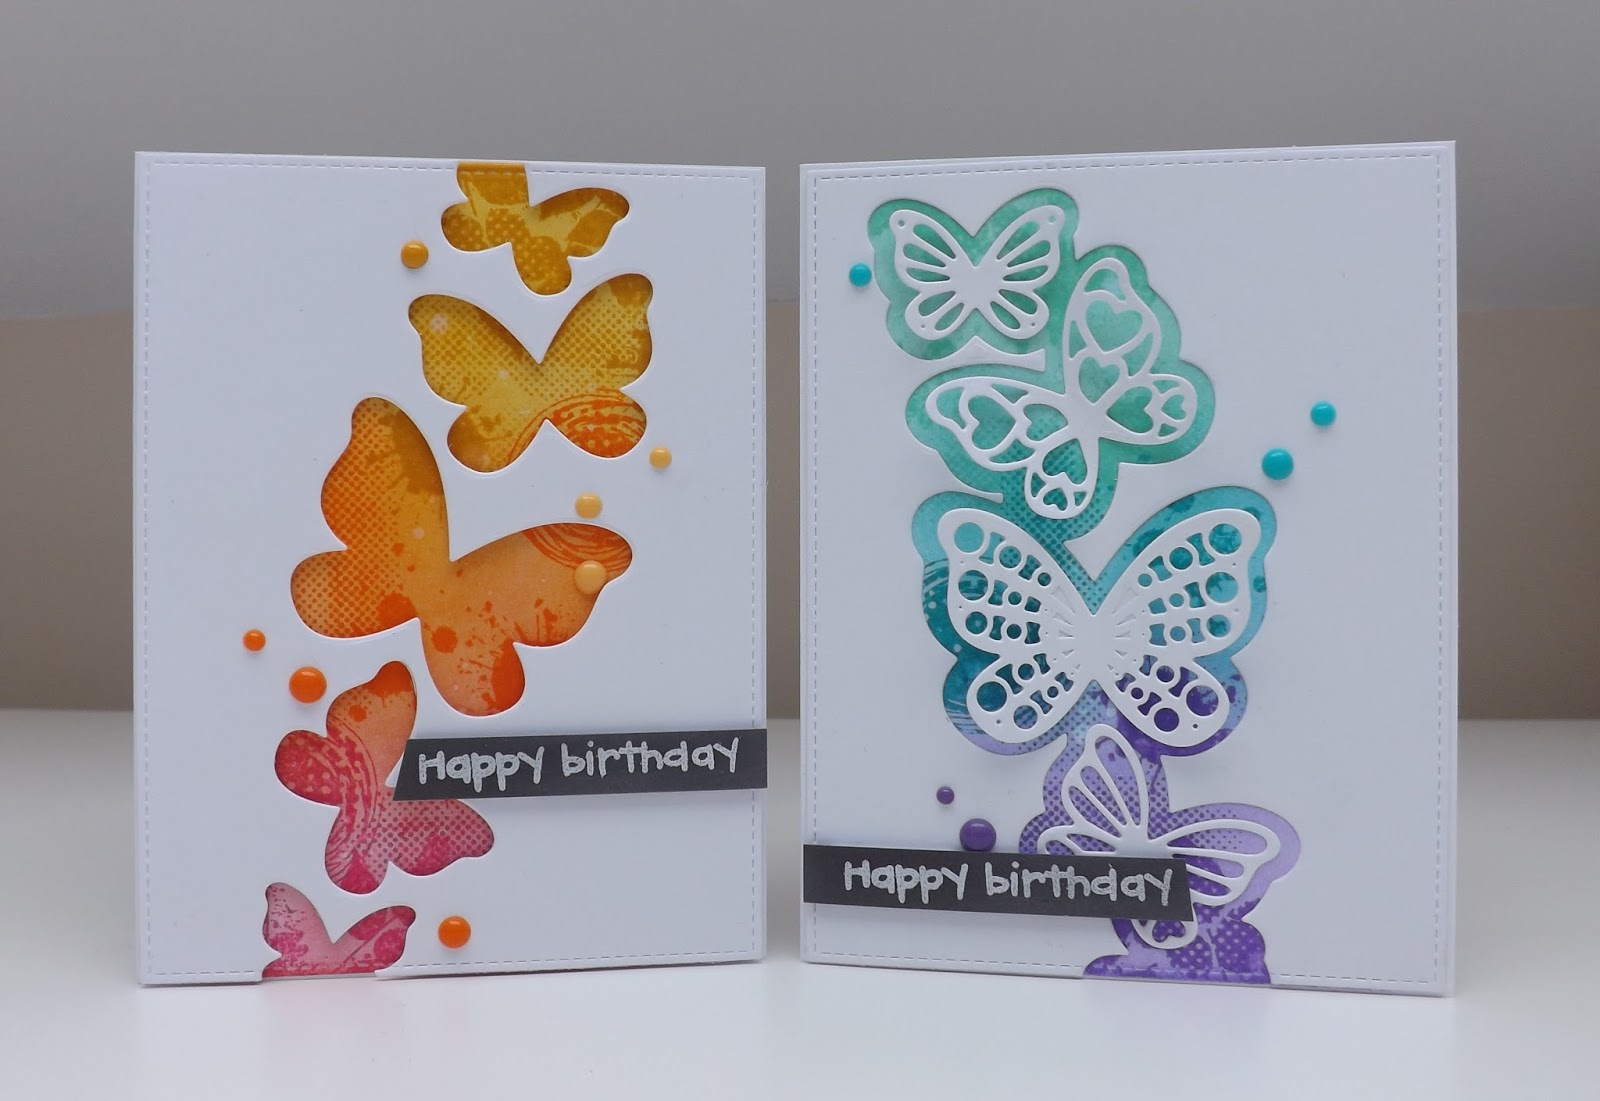
A lovely bright duo of Birthday cards using the fab Cascading Butterflies Die from Sue Wilson and Creative Expressions! I LOVE the way you can get just the butterfly apertures using the detail butterfly die by itself :D :D :D

A really simple and fun design for a card :D This is such a fun design, because you can literally create whatever wacky background you want, and then simply add your aperture over the top :D I decided to do some ink blending and add some coordinating coloured stamping over the top to give a gorgeous and bright ombre look, but this would also be fab over the top of a Gelli Print or a watercolour wash, or even a patterned paper which you could cover in glitter or clear micro beads etc there are so many variations :D For the orangey yellow card I simply used just the aperture from the inside die from the set, and for the tealy purple card, I used the outside die to create my aperture, then I added some of the detail butterflies back in (and I actually used the ones I'd cut out of the other card, so no waste either when you made both versions :D) I then simply added my sentiment and a scattering of coordinating coloured Nuvo Drops (which as usual I have already pre-made and stored in little pots for convenience :D)

Main products used in this video (affiliate links used) :D
Sue Wilson Cascading Butterflies Die Set
Creative Expressions Lisa Horton Art Background Stamps
Creative Expressions Lisa Horton Butterfly Splash
Perfect Medium Ink
Cosmic Shimmer Detail White Embossing Powder
Creative Expressions Slate Grey and Coconut White Cardstock
Cosmic Shimmer Glue
Distress Ink - Picked Raspberry, Carved Pumpkin and Fossilized Amber then Cracked Pistachio, Peacock Feathers and Wilted Violet
Nuvo Crystal Drops from Tonic - Ripened Pumpkin, Sugared Almond, English Mustard, Caribbean Blue and Crushed Grape

To see the process behind this card, please watch my YouTube video below, or over on my channel CRaFTi PoTeNTiAl :D


Loads more photos below :D


Tuesday, 11 April 2017

Tonic-tastic Birthday Love :D


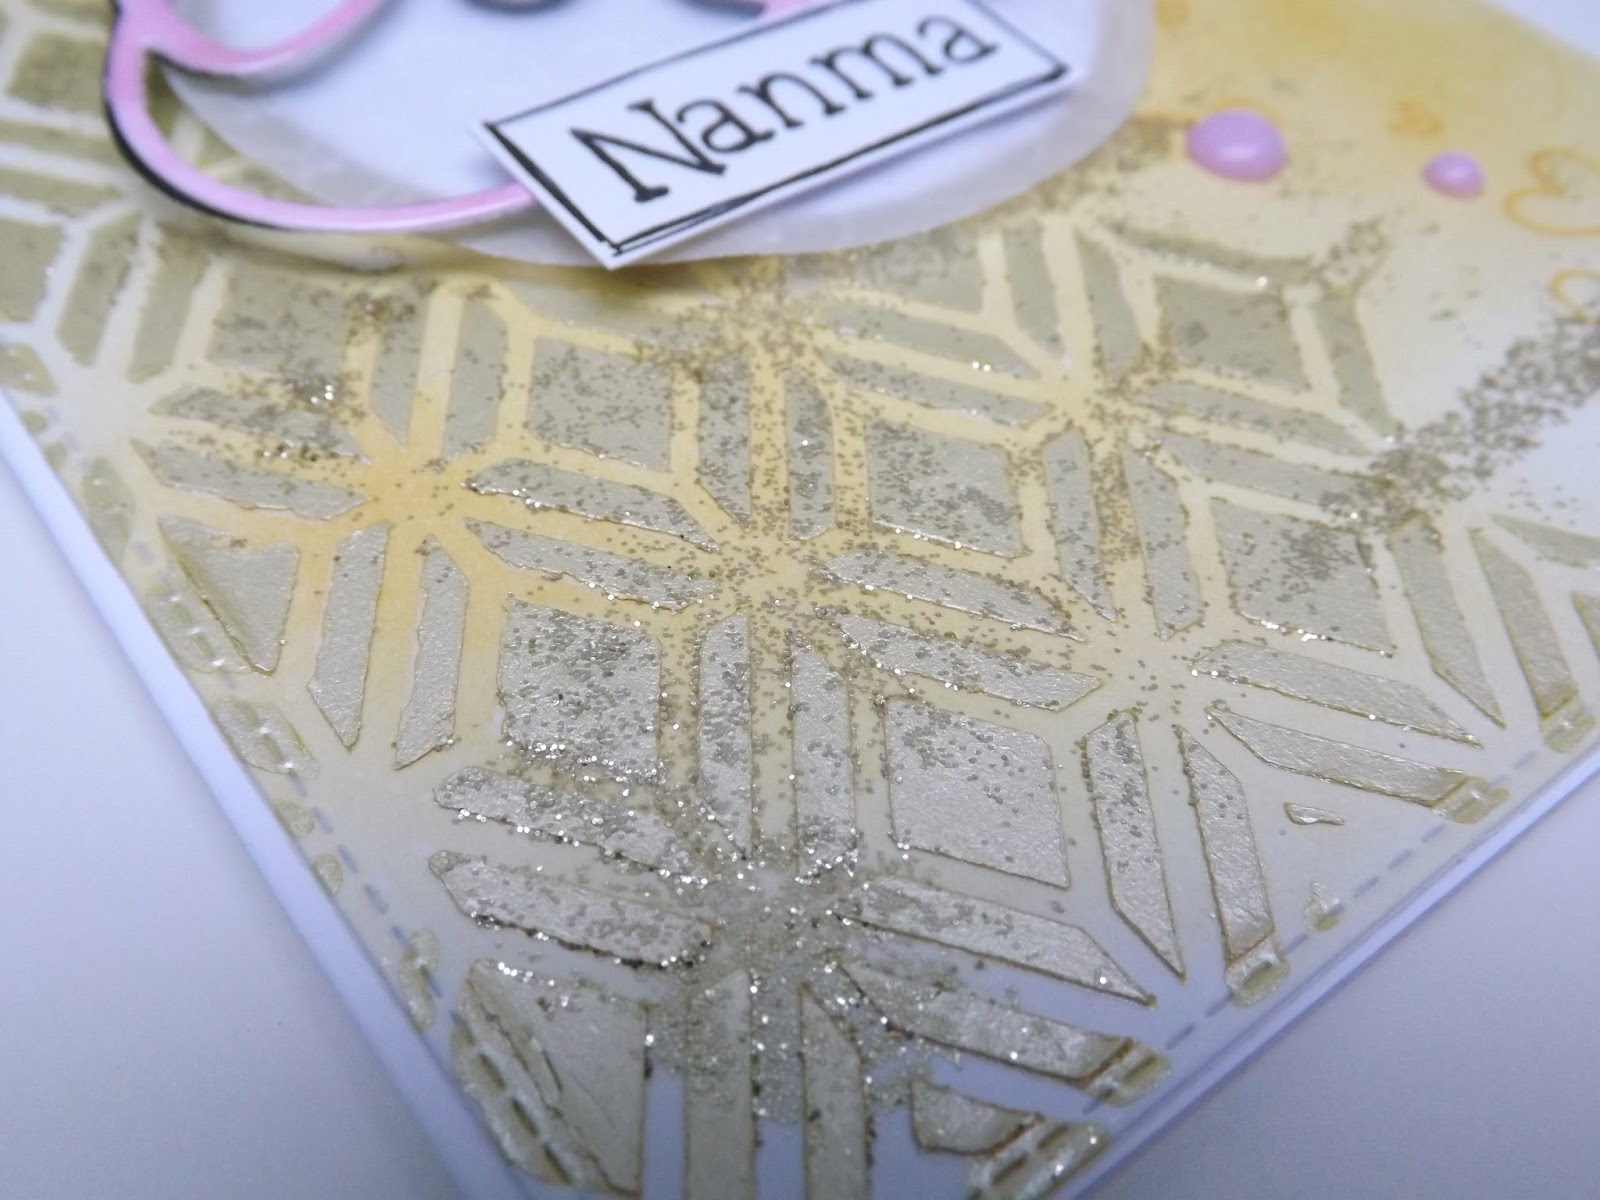
A totally Tonic-tastic Birthday card today using tonnes of products from Tonic Studios including; stencils, embossing folders, embellishment mousse, dies, glimmer paste, nuvo crystal drops, and of course their trusty craft pick and glass mat too :D You can see in the video below the process behind all the methods I used on this card, I did; ink blending for the first layer, then used some Nuvo Mousse through a Tonic Stencil, then used the mousse straight onto card with my finger, I think I also watered down some mousse and splashed it onto the card, I also used the mousse to watercolour in my little bunny, I then used the embossing folder to emboss vellum for a subtle addition of texture, I also added some glimmer paste with my fingers to give a random glittery look, and to finish it all off I added some pre-made Nuvo Crystal Drops :D Hope you liked the card :D

Main products used in this video (Affiliate links used where I can) :D
Tonic Studios Bevelled Diamond 6x6 Stencil
Tonic Studios Retro Fern Embossing Folder
Tonic Studios Nuvo Embellishment Mousse - Lemon Sorbet and Peony Pink
Tonic Studios Sent With Love Sentiment Die
Tonic Studios Nuvo Glimmer Paste - Golden Crystal
Tonic Studios Craft Pick
Tonic Studios A3 Glass Cutting Mat 
Tonic Studios Nuvo Crystal Drops - Sweet Lilac
Mama Elephant Lunar Animals Stamp Set
Lawn Fawn Smitty's ABCs Stamp Set
Lawn Fawn Stinkin' Cute Stamp Set
Lawn Fawn Year Two Stamp Set
Ranger Tim Holtz Distress Ink - Scattered Straw and Fossilized Amber

To see the process behind this card, please watch my YouTube video below, or over on my channel CRaFTi PoTeNTiAl :D


Loads more photos below :D 


I'm entering this card into the Simon Says Stamp Monday Blog Challenge, and also the Simon Says Stamp Wednesday Challenge too :D AND the Win and Tonic Anything Goes Challenge too :D